

Growing Your Own Philodendron Red Emerald
Philodendron Red Emerald is a tropical plant which belongs to the Araceae family and is native to South America. This plant is known for its large, shiny leaves and vibrant red stems that make it a popular choice among indoor plant enthusiasts.
The name “Philodendron” comes from the Greek words “philo,” meaning love, and “dendron,” meaning tree. It is easy to care for and propagate, which makes it an excellent choice for both novice and experienced gardeners.
Explanation of Philodendron Red Emerald
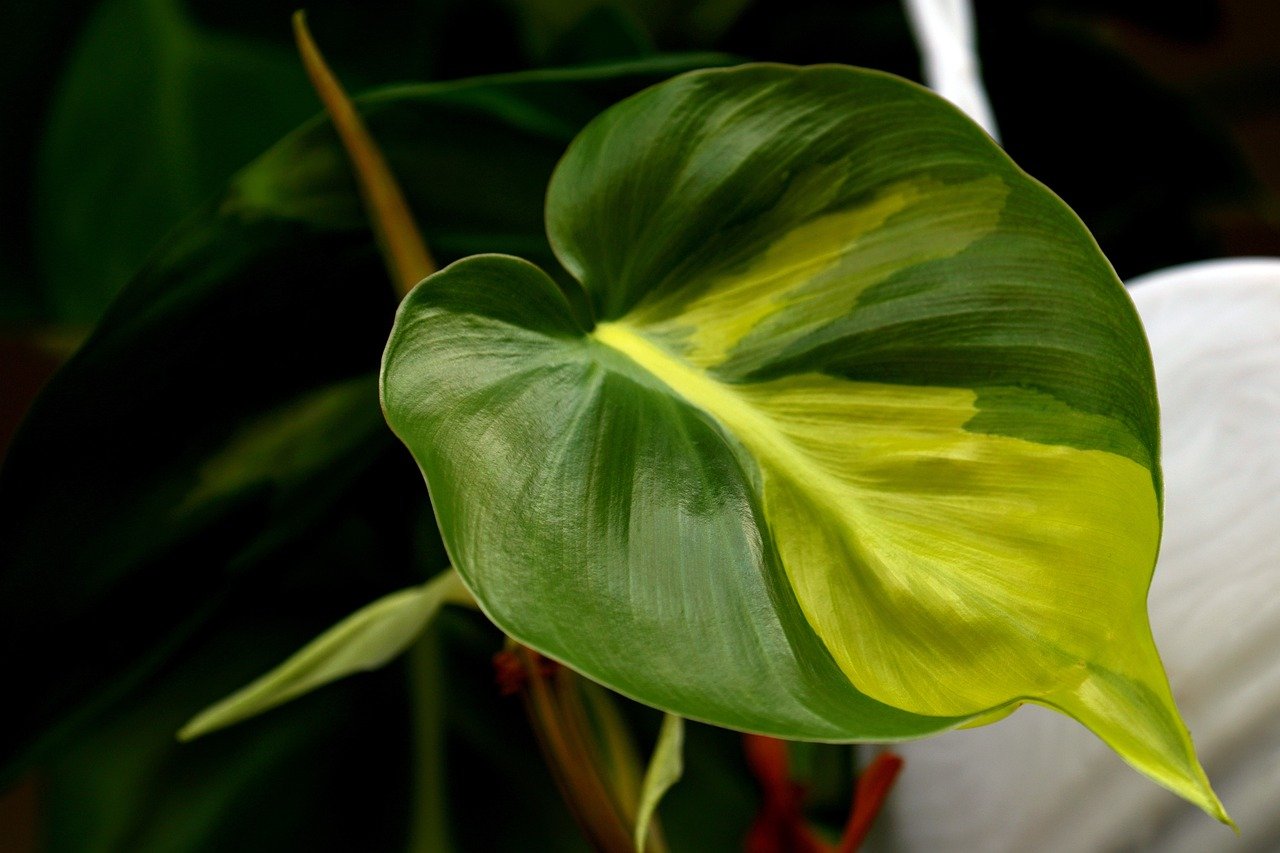
Philodendron Red Emerald, scientifically known as Philodendron erubescens, can be identified by its large leaves that grow up to 8 inches long and 5 inches wide.
The leaves are heart-shaped, dark green in color with light veins that give them a unique texture. The plant can grow up to 3-4 feet high indoors with proper care.
What sets Philodendron Red Emerald apart from other Philodendrons is its vibrant red stems that stand out against the green foliage. These stems become more pronounced as the plant matures, making it a stunning addition to any indoor garden.
Importance of propagation for plant enthusiasts
Propagation is essential for any gardener who wants to expand their collection of plants or share their favorite species with others. Propagation refers to the process of growing new plants from existing ones through various methods such as stem cuttings or division.
For plant enthusiasts who enjoy collecting or trading rare varieties of plants such as Philodendron Red Emerald, propagation provides an opportunity to increase their collection without having to purchase new plants. Additionally, propagating plants allows gardeners to maintain genetic diversity within their collection while also preserving rare or endangered species.
Understanding how to propagate Philodendron Red Emerald can be a rewarding experience for any indoor gardener. Not only does it allow for the expansion of one’s collection, but it also helps to preserve this beautiful plant species for generations to come.
Understanding Philodendron Red Emerald Propagation
Philodendron Red Emerald is a popular houseplant known for its beautiful red leaves and ease of care. However, many plant enthusiasts desire to propagate this plant to add more plants to their collection or share with friends. There are three primary methods of propagating the Philodendron Red Emerald: stem cuttings, division, and air layering.
Types of Propagation Methods
Stem cuttings involve taking a cutting from the mother plant and encouraging it to root in water or soil. Division involves separating the root ball of an established plant into two or more plants, each with its own roots and leaves. Air layering is a process where you encourage roots to grow on a branch while it’s still attached to the mother plant by wrapping it in moss and plastic until roots develop.
Stem Cuttings
Stem cuttings are one of the simplest methods for propagating Philodendron Red Emerald. The best time to take stem cuttings is during spring or summer when the plant is actively growing.
To take a cutting, use clean, sharp scissors or pruning shears and select a healthy stem that has at least one leaf node (where leaves emerge from the stem). Cut just below the node at an angle so that water can easily enter into the stem without sitting on top of it.
Division
Division is another way to propagate Philodendron Red Emeralds once they have grown large enough that their root systems have developed fully. It’s important only to divide healthy plants because sickly ones will not establish themselves well in new soil conditions. To divide your plants, gently loosen the soil around each side of your parent pot using a forked tool before tipping it over onto its side so that you can remove all sections easily.
Air Layering
Air layering is a bit more complicated than stem cuttings or division, but it can be a great way to propagate Philodendron Red Emerald. This method involves making a small cut on the plant’s stem and wrapping it with moist sphagnum moss before securing it in place with plastic wrap or other waterproof material.
After several weeks, the roots should develop in the area covered by the moss. Once they are large enough, you can detach the new plant and pot it up separately.
Best Time to Propagate
The best time for propagation of Philodendron Red Emerald depends on which method you use. Stem cutting is best done during spring and summer when the plant is actively growing. Division is best done when you’re repotting your plant, while air layering can be done any time of year.
Tools and Materials Needed
The tools needed for propagation vary depending on which method you choose. For stem cuttings, you will need sharp scissors or pruning shears, while division requires a forked tool to loosen soil without damaging roots.
Air layering calls for sphagnum moss and plastic wrap to help protect your new plant while roots develop. Additionally, some people may prefer using rooting hormone powder or liquid to speed up root development during propagation.
Overall, understanding Philodendron Red Emerald propagation methods is essential for anyone looking to expand their collection of this beautiful houseplant variety.
With proper knowledge of these techniques and good-quality materials at hand, propagating this plant can be an enjoyable experience that yields great results for years to come!
Propagating Philodendron Red Emerald through Stem Cuttings
Preparation of the Mother Plant
Before taking stem cuttings, it is essential to prepare the mother plant properly. This will ensure that the cuttings are healthy and have a better chance of rooting successfully. Begin by selecting a healthy Philodendron Red Emerald plant and watering it well the night before you take the cuttings.
This will help keep the plant hydrated during the cutting process. Next, choose a stem that is at least four inches long and has several leaves on it.
Make sure to use sharp and sterilized pruning shears or scissors to make a clean cut, which will increase your chances of success. Remove any leaves or flowers from the lower two inches of the stem as they may rot when placed in soil.

Cutting the Stem
With sterilized pruning shears or scissors, make an angled cut below a node (the point where leaves attach to stems). The angle should be about 45 degrees so that water does not collect on top of it which may cause rotting for both parent and cutting. Next, remove any leaves from along lower two inches of stem so no leaves are buried in soil if propagated in potting mix.
Preparing Cutting for Rooting
Now prepare your cutting by removing any flowers or buds since they can drain energy while attempting rooting, depriving your cutting from turning into strong roots.
Dip exposed end in rooting hormone powder (optional) before placing into moistened potting mix prepared with 50% perlite giving air pockets for drainage control until root development occurs. To retain moisture around stem, cover with plastic bag secured with twist tie over plant stake inserted into soil away from base but providing ample space between enclosed foliage and plastic for air circulation.
Rooting the Cutting
Rooting of Philodendron Red Emerald stem cuttings usually takes from 4-6 weeks, but may vary depending on the temperature and humidity. During this period, it is important to keep soil moist without being too wet or allowing standing water which suffocates roots. Provide indirect sunlight through a window or artificial light for at least eight hours daily while checking often to ensure healthy, strong plant growth.
Transplanting
After 4-6 weeks of rooting, check development and transplant when there are more than three leaves growing on your cutting. Gently remove plastic bag and stake then lift cutting carefully from soil with root ball intact. Transplant into prepared pot filled with a well-draining mix of peat moss and perlite, or coco coir.
Water thoroughly after transplanting to make sure soil is well soaked so roots have access to nutrients. Keep plant in a warm area with bright indirect sunlight, avoiding direct sun which may cause damaging rays that scorch leaves.
Propagating Philodendron Red Emerald through Division
Preparation of the mother plant
Before dividing the root ball, it is essential to prepare the mother plant adequately. Start by watering the plant a few days before the division process. A well-hydrated plant is easier to handle and more resilient during transplantation.
Afterward, remove any dead or dying leaves from the plant. These can harbor pests and diseases, which may affect both the mother plant and its divisions.
Dividing the root ball
Once you have prepared your mother plant, it is time to divide its root ball. Start by removing it from its current pot or container carefully.
You may need a tool such as a trowel or digging fork for this step if your philodendron roots are tightly bound. The next step is to separate individual sections of your philodendron’s roots into smaller divisions with sharp scissors or pruning tools.
To identify where each section should be cut, look for natural separations in your philodendron’s root system that create groups of roots growing together. It would help if you aimed to leave at least three leaves per division when cutting so that each part has enough foliage for photosynthesis while establishing new roots.
Preparing each division for planting
After dividing your philodendron’s root ball into smaller sections, you need to prepare each division for planting separately carefully. Start by trimming away any damaged or dead foliage and trimming back any long strands of roots that will not fit in their new container comfortably.
When selecting pots for transplantation, choose containers that are one size larger than what you previously had them growing in and have drainage holes at their bottom so excess water can escape quickly without causing waterlogging issues. Fill each pot halfway with well-draining potting soil composed of equal parts of peat moss, perlite, and vermiculite.
Place the root ball in the center of the pot and fill it with more potting soil until it reaches within an inch or two of the rim. Water each division thoroughly to settle the soil around its roots and help remove any air pockets within them, then place your newly propagated plants in a well-lit area away from direct sunshine to avoid scorching their foliage.
Step-by-Step Guide to Propagating
Preparation of the Mother Plant
Before starting the air layering process, it is important to prepare the mother plant. Choose a healthy stem on the philodendron that is at least one year old and has a diameter of about 1 inch.
Make sure it is not a new growth or a tip cutting. You want to choose a mature stem because it should already have enough energy stored in it for successful rooting.
Once you have chosen your stem, remove any leaves and branches about 12 inches from where you plan on making your air layering cut. This will leave you with a bare section of stem that will be easy to work with when wrapping it later.
Selecting a Branch for Air Layering
Selecting the right branch for air layering is crucial in successful propagation. Find an area on the chosen stem where there are no branches or leaves within four inches above or below where you plan on making your cut. This will ensure that there is enough room for wrapping and rooting.
Make sure that the branch you choose has at least one node, which is where roots will form during air layering. Nodes are small bumps along the stem where new growth can occur and are essential for root formation.
Wounding and Wrapping the Branch
The next step in air layering involves wounding and wrapping the selected branch. Using a sharp knife, make two parallel cuts around the circumference of the stem about an inch apart, making sure not to cut too deep into the wood of the plant.
Next, remove all bark between these two parallel cuts by gently scraping it away using your knife or fingers. This wound will encourage new roots to grow in this area while keeping them contained within this section of the stem.
Wrap this area with sphagnum moss, making sure to keep it moist. You can also wrap the moss with plastic wrap or aluminum foil to hold it in place and create a humid environment for root development.
Root Development and Separation
After about 4-6 weeks, you should start to see roots growing through the moss. Once these roots are at least one inch long, you can cut below them to separate your new plant from the mother plant. Be sure to keep the roots moist during and after separation.
Once separated, plant your new Philodendron Red Emerald in a well-draining potting mix and water thoroughly. Place it in bright, indirect light and continue to care for it as you would any other philodendron.
Air layering may take some practice and patience but is a great way to propagate Philodendron Red Emerald without harming the mother plant. By following these steps carefully, you can successfully add more of these beautiful plants to your collection.
Tips and Tricks for Successful Propagation
Maintaining Proper Humidity Levels
One of the essential factors in successful Philodendron Red Emerald propagation is humidity. Philodendrons thrive in a humid environment, and maintaining the right levels of moisture is crucial for the cuttings or divisions to root. To ensure proper humidity levels, consider covering the cuttings or divisions with plastic bags or placing them in a terrarium.
These methods help to trap moisture around the plants and promote faster rooting. Alternatively, you can use a humidifier to create moisture around your plants.
In addition to keeping your plant’s environment moist, it’s important not to overwater it. Overwatering can lead to root rot and other issues that could negatively impact your plant’s health.
A good rule of thumb is not to water until the top inch of soil is dry. Keeping a consistent watering schedule will help maintain healthy conditions for your new philodendron red emerald plants.
Choosing Healthy Cuttings or Divisions
When propagating Philodendron Red Emerald, it’s crucial to select healthy cuttings or divisions from a mature plant. Choose sections with at least two nodes (or buds) on the stem, as this ensures that you have enough material for roots and leaves to develop. Also, look out for any signs of disease or pests such as wilting leaves or holes in leaves.
Furthermore, when taking stem cuttings or dividing your mother plant, ensure that you use sharp tools such as pruning scissors or shears so that you make clean cuts without damaging any nearby stems. Any damaged sections could attract pathogens that could harm your plant’s overall health.
Avoiding Common Mistakes
Propagation can be challenging even for experienced gardeners; however, avoiding these common mistakes will increase your chances of success. One mistake is not providing enough light for your cuttings or divisions. Philodendron Red Emerald plants require bright indirect light to thrive, so it’s essential to place your plants near a window that receives ample sunlight.
Another common mistake is over-fertilization. While it may be tempting to fertilize your new plant babies right away, this could lead to root burn and other problems.
Instead, wait for about six months before feeding them with a balanced fertilizer. By following these tips and tricks, you will be on the path to successfully propagating Philodendron Red Emeralds.
Remember to keep the environment moist with proper humidity levels and provide enough light while avoiding common mistakes such as overwatering and over-fertilization. With patience and care, you can watch your new plants grow into mature philodendrons in no time!
Can the Propagation Method for Philodendron Red Emerald be Applied to Marble Money Plants?
The propagation method commonly used for Philodendron Red Emerald may not necessarily be applicable to marble money plant houseplants. Each plant species may have its own specific requirements and techniques for successful propagation. It is important to research and follow guidelines specifically tailored to the marble money plant houseplant to ensure proper growth and propagation.
Conclusion
Philodendron Red Emerald is an excellent houseplant that can add beauty to any space. Propagating this plant is a great way to expand your collection and share it with friends.
In this article, we have discussed several methods of propagation, including stem cuttings, division, and air layering. Each method has its advantages and disadvantages, but they all have the potential to produce healthy plants when done correctly.
Key Points on Philodendron Red Emerald Propagation
Propagation of Philodendron Red Emerald can be done by stem cuttings, division or air layering. Stem cuttings are commonly used by growers due to their ease of use. Division is the best method for mature plants that have developed a large root system.
Air layering is another option that requires more time and patience but produces high success rates. To propagate using stem cuttings, choose healthy stems with multiple nodes and make sure they are free from diseases or pests.
To propagate using division, separate the plant into smaller portions during its dormancy period in spring or fall when it’s not actively growing. For air layering, select a branch with at least one node below the area where a new root system will form.
Encouragement to try propagating this beautiful plant
Propagating Philodendron Red Emerald can be an exciting experience for both novice and experienced gardeners alike! Watching new roots grow and seeing your plant thrive under your care can be very rewarding. The methods discussed in this article are straightforward enough for anyone to try at home.
Remember that patience is key when propagating any type of plant – don’t give up if you don’t see results immediately! Just keep caring for your cutting or division until it grows into a robust plant on its own.
We hope that this article has provided you with enough information to propagate Philodendron Red Emerald successfully. With the proper care and attention, you can enjoy this beautiful plant in your home for years to come.